
6
SepOrganizing your product offerings effectively is crucial for maintaining a streamlined workflow and ensuring your team can easily access and manage products. Salesforce Product Catalog Management allows you to structure your product data by creating catalogs, categories, and subcategories. Think of this as organizing a library: your catalog is the bookshelf, categories are the shelves, and subcategories are the sections within those shelves. This structured approach simplifies product management and keeps everything in order.
The Foundation: Creating a Catalog
A catalog is the foundation of your product organization in Salesforce, much like a bookshelf in a library. It holds all the products your business offers, providing a framework for further organization.
1. Set Up the Catalog:
Name: Start by naming your catalog, just as you would label a bookshelf. For example, "2024 Electronics Catalog."
Description: Add a description to outline the purpose or contents of the catalog. This field is a Long Text Area with a capacity of up to 32,000 characters, allowing for detailed information much like a summary on the side of a bookshelf.
Start and End Dates: Specify the catalog's validity period by setting the start and end dates. This is like determining when a new section of the library will be on display.
Type: Choose the type of catalog, such as "Sales Catalog" or "Service Catalog," to specify its purpose. This helps categorize the catalog itself, just like different sections in a library might be for fiction or reference books.
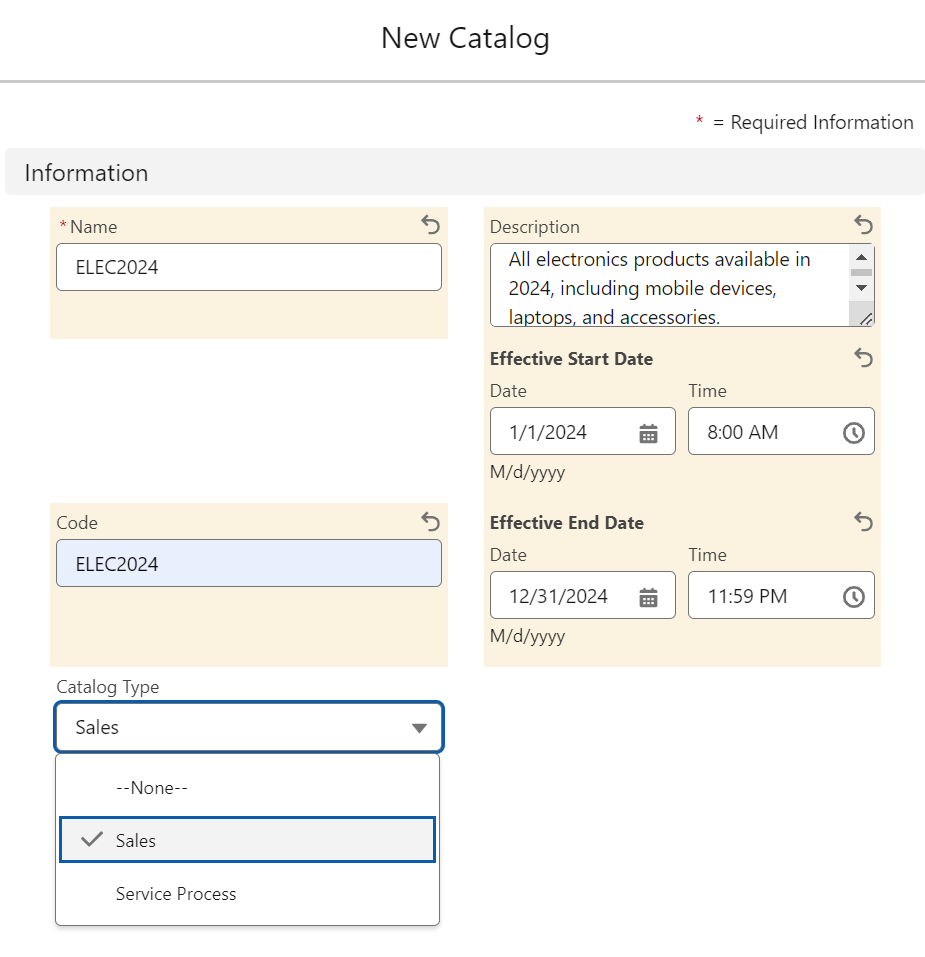
Code: Assign a unique code to the catalog for easy identification and reference, similar to a catalog number in a library system. The code is a Text field with a 255-character limit and is unique case-insensitive.
Viewing Catalogs: You can view all your catalogs from the Catalogs List View, making it easy to manage and access your various catalogs as needed.
Organizing the Shelves: Creating Catalog Categories and Subcategories
Once your catalog (bookshelf) is set up, the next step is to organize the shelves (categories) and sections within those shelves (subcategories). Categories help you sort products into logical groups, making them easy to find, just like different genres in a library.
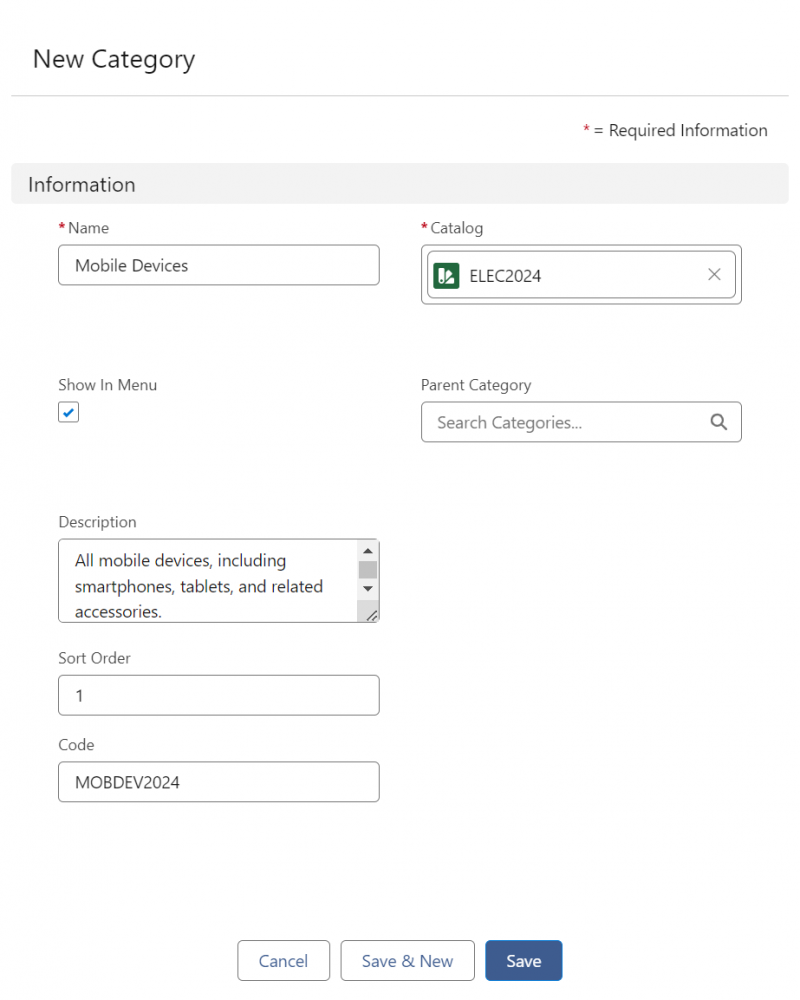
2. Create Categories:
Name and Describe the Category: Give each category a name and description that clearly defines the type of products it will include. For instance, within your "Electronics" catalog, you might have categories like "Mobile Devices" and "Laptops."
Parent Category: If a category falls under a broader category, select a parent category. This helps maintain an organized hierarchy, much like organizing books by genre first, then by author. The Catalog and Parent Category fields populate automatically based on your previous selections.
Sorting Order: Define the order in which categories should appear on the shelf. This ensures that the most important or popular categories are listed first.
Category Code: Assign a unique code to each category, helping to keep them distinct and easily searchable, similar to a classification code in a library.
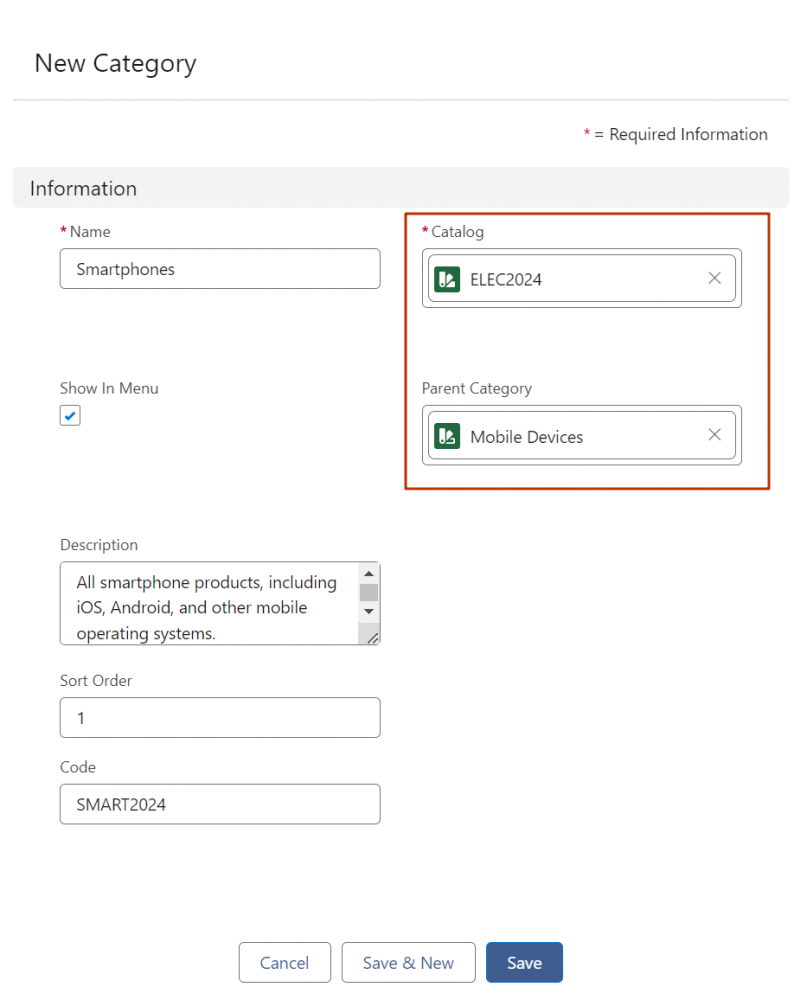
3. Create Subcategories:

Name and Describe the Subcategory: Subcategories are like the specific sections within a genre. For example, under "Mobile Devices," you might have subcategories like "Smartphones" and "Tablets."
Code and Sort Order: Enter a name, description, code, and sorting order for the subcategory to define its placement within the parent category.
Automatic Population: The Catalog and Parent Category fields populate automatically, streamlining the setup process.
Update Subcategory Order: Use the "Update Subcategory Order" feature to rearrange these sections, ensuring that the most relevant subcategories are easy to find.
Assigning Products to Catalogs, Categories, and Subcategories
After setting up your catalogs, categories, and subcategories, the next step is to assign your products to them. To assign a product to a catalog category or subcategory, ensure that the option "Sell only with other products" is deselected on the product. Products that are configured to be sold only with other products cannot be assigned to catalog categories or subcategories.
To begin the assignment, go to the catalogs list view and select the catalog containing the category or subcategory you want to use. From the Category page, click on the Related tab. In the Products section, click Assign Products to place your products in the appropriate categories or subcategories. This ensures that each product is properly organized and easy to locate within the catalog structure.
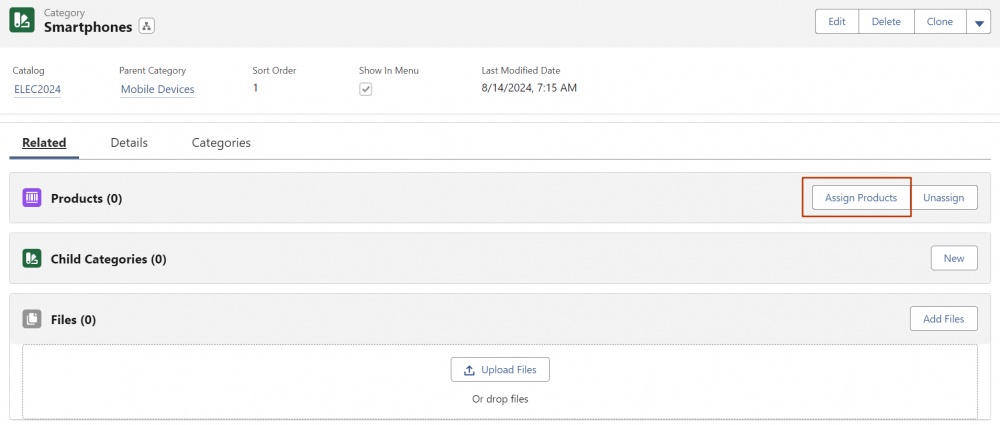
You can also assign products to categories directly from the product record. Simply go to the Catalog tab under the Configure tab, and click the Assign button. Choose the desired category, then click Save to complete the assignment.
Creating catalogs, categories, and subcategories in Salesforce Product Catalog Management is like building a well-organized library for your products. This structured approach not only makes it easier for your team to navigate and manage products but also ensures that your product catalog is tailored to meet your business’s unique needs.
If you need expert help in setting up your Salesforce Product Catalog, Milo Massimo’s team is ready to assist, ensuring that your product management processes are as efficient and effective as possible.
Comments (0)