28
NovManaging a diverse product portfolio can be challenging, especially when products share common attributes but differ in specifics. Salesforce Revenue Cloud provides a feature called Product Classifications to streamline this process. Product Classifications act as templates that group common attributes, making it easier to create and manage similar products efficiently.
What Are Product Classifications?
A Product Classification in Salesforce Revenue Cloud is essentially a template that groups dynamic attributes applicable to multiple similar products. By using Product Classifications, businesses can create products that inherit common attributes, saving time and ensuring consistency. This approach is ideal for managing product families where items share a set of base attributes but vary in specific details.
Let’s consider a software company that offers a range of licenses for its product. These licenses might include Basic, Standard, and Premium versions, each with attributes like:
-
License Duration (e.g., monthly, annually)
-
User Limit (e.g., single user, team)
-
Support Level (e.g., standard, priority)
-
Access Level (e.g., basic features, advanced features)
Setting Up a Product Classification for Software Licenses
To create a Product Classification in Salesforce Revenue Cloud:
-
Navigate to Product Classifications: Open the Product Catalog Management app and go to Product Classifications.
-
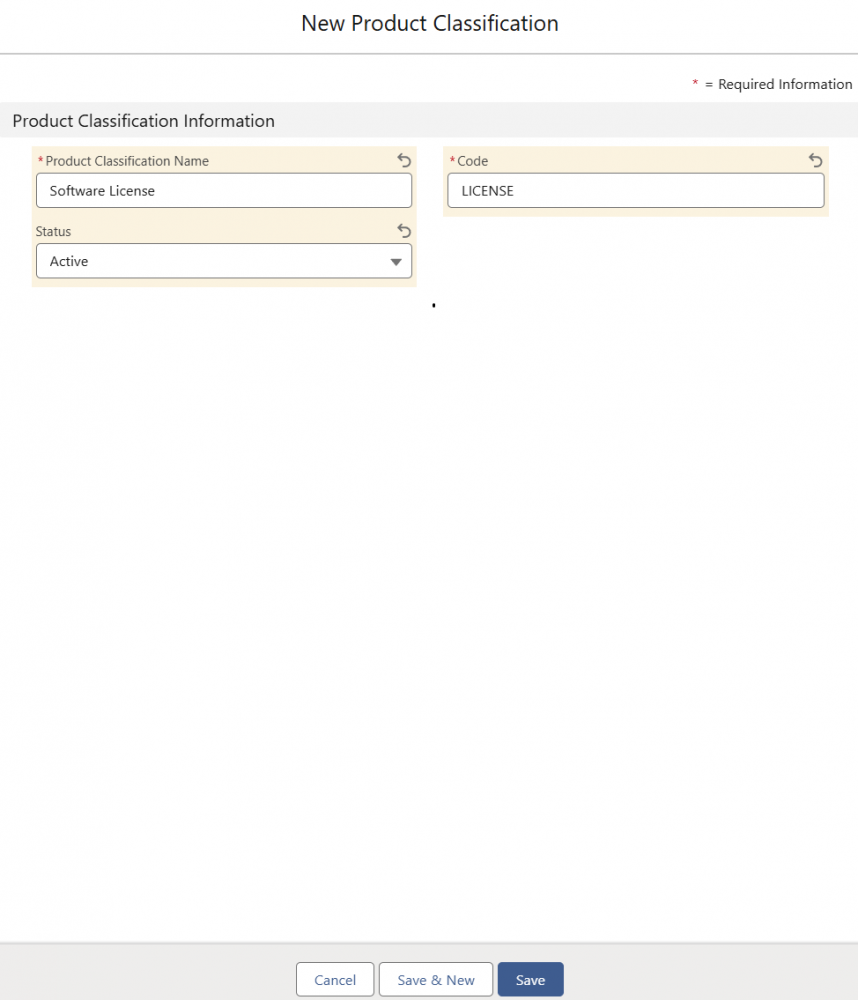
Create a New Classification: Click New to define a Product Classification. Enter a name (e.g., “Software License”), a unique code, and set the status to Active.

-
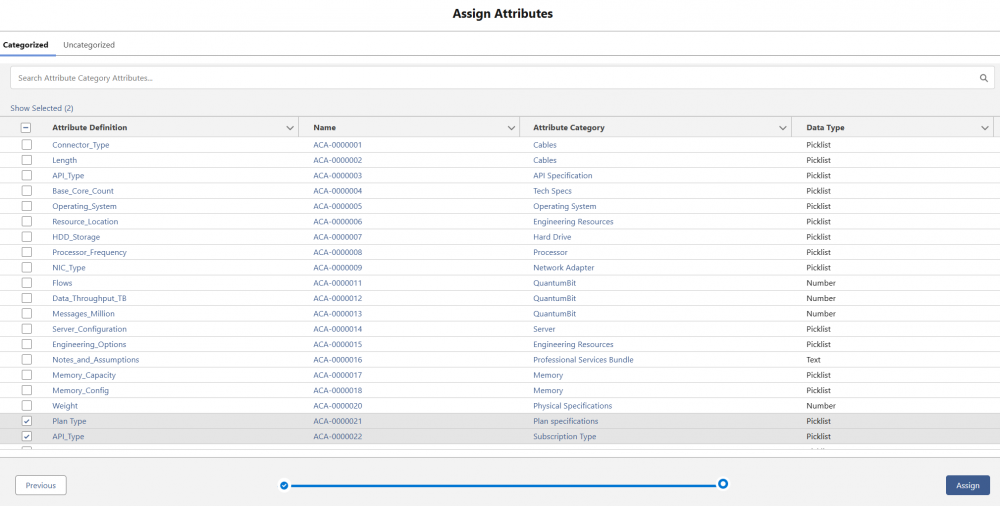
Assign Common Attributes: Define shared attributes that will apply to all licenses under this classification. Attributes can be assigned to Product Classifications individually or through attribute categories, offering flexibility in how they are organized. You can also set display types to improve user experience during configuration. For example:
-
License Duration: A picklist with options like “Monthly” or “Annually.”
-
User Limit: Use a slider to adjust user count, with predefined increments (e.g., 1, 5, 10 users) so users can easily select the appropriate limit.
-
Support Level: A picklist to choose between “Standard Support” or “Priority Support.”
-
Access Level: Use a toggle to allow users to switch between “Basic” and “Premium” access levels, making the choice more visually intuitive.
-

These display types help enhance usability. For instance, a slider simplifies selecting user limits, and a toggle makes switching between access levels quick and clear.
Customizing Attributes for Specific License Products
While each license product inherits common attributes from its Product Classification, you can adjust certain attribute values at the individual product level if needed. For example, a Basic License could be limited to a single user with standard support, while a Premium License might allow more users and offer priority support. These adjustments don’t alter the classification template, preserving its structure while allowing flexibility.
Handling Attribute Assignment Conflicts
When assigning attributes to Product Classifications, Salesforce ensures that duplicate assignments are avoided. If an attribute has already been assigned (e.g., individually or through another category), Salesforce will alert you to the conflict and only add attributes that haven’t yet been assigned. To avoid such issues, ensure each attribute is assigned uniquely, whether individually or via an attribute category. 
Enhancing the User Experience
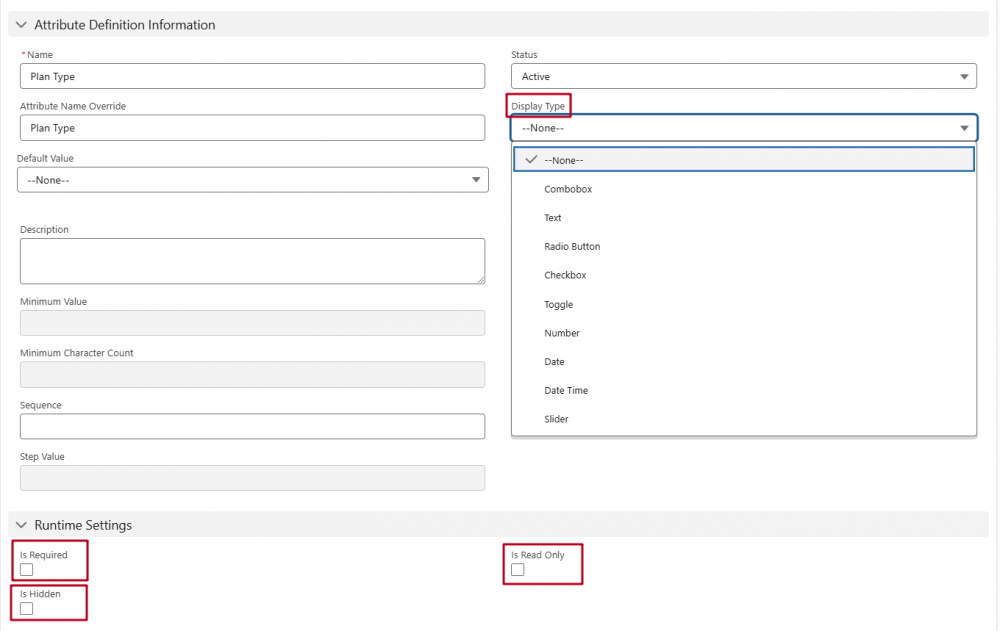
Salesforce Revenue Cloud allows you to control how attributes are displayed and behave during the configuration process. Some key settings on the Product Classification Attribute (the relationship between a product classification and its attributes) include:
-
Is Required: Ensures that an attribute requires a value.
-
Is Hidden: Hides an attribute from the end-user’s view.
-
Is Price Impacting: Marks whether the attribute affects pricing (e.g., higher user limits might increase license costs).
-
Display Type: Allows for interactive elements like sliders for number-based attributes.
-
Include or Exclude Picklist Values: For picklist-type attributes, you can control which values are available at runtime. By default, all picklist values are included, but you can exclude specific values to simplify selection. For instance, if certain support levels are not available for a particular license, you can exclude those options, ensuring users see only the relevant choices during configuration.

These settings enable a more dynamic, user-friendly experience when configuring products, as only relevant attributes are visible and required based on the user's selections.
Once a Product Classification is created, you can view and manage attributes in the Attributes tab. Additionally, any products based on this classification will appear in the Related list under the Product Classification, allowing you to easily track which products inherit the attributes defined in this template. This setup provides a centralized view of both the classification’s attributes and the associated products.
Product Classifications can be linked to a Product Configuration Flow to streamline the configuration process. Before linking, both the Product Configuration Flow and the Product Classification must be set up. While multiple classifications can be assigned to a single flow, each classification can only have one flow, ensuring a consistent configuration experience across products.
Comments (0)