
9
FebApproval conditions test to see if approval is needed for certain records by comparing two things.
Regardless of the scenario we are testing, we will always have three pieces as part of your tests:
We're going to look at something to compare
We're going to figure out how to compare it
We're going to determine what to compare against
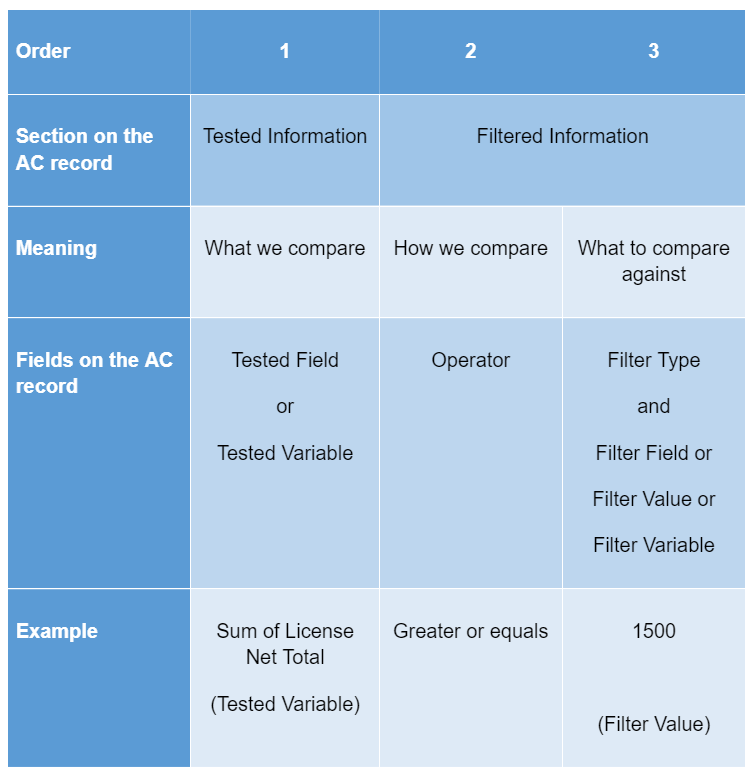
Fields on the Approval Condition record
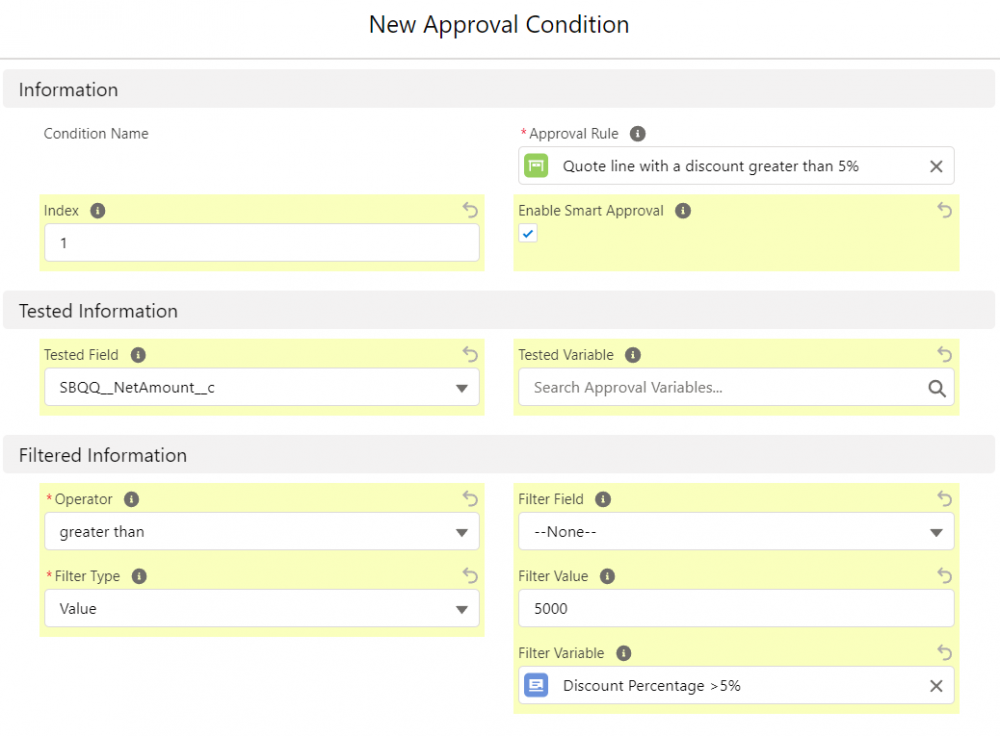
When creating an Approval Condition, the Condition Name is system generated.
The Approval Rule - a lookup to the rule the condition belongs to.
Enable Smart Approval - when this field is checked, the package compares the value in the Tested Field or Tested Variable to previous submissions. If the results are the same or better than for a previously approved request, this condition will not need to be reapproved.
Index - this is a number you should manually assign to a condition to reference it in advance condition logic.
Tested Field - the field that we evaluate for this condition.
Tested Variable - the approval variable summarizing information about child records that we need to evaluate for this condition.
Filter Type - determines if the tested field or variable will be compared to another field on the target object, a static value, or another approval variable.
Filter Field/ Value/ Variable - contains the field/value/variable the tested field will be compared to when determining if approval is needed.
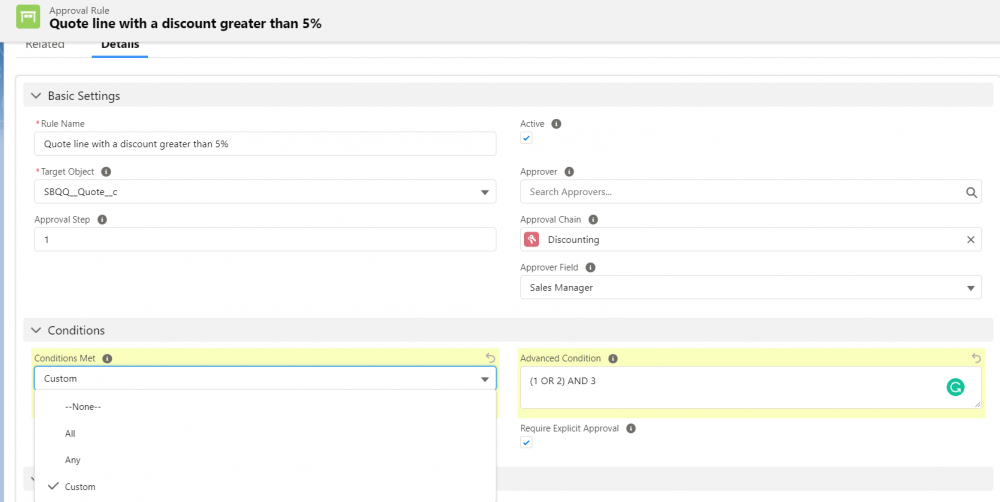
On the Approval Rule record, there are two fields directly related to the Approval Conditions: Conditions Met and Advanced Condition.
Conditions Met, which determines how conditions relate to each other:
All - the default value and means all conditions must be met.
Any - just one of the conditions needs to be met.
Custom - custom condition logic is required.
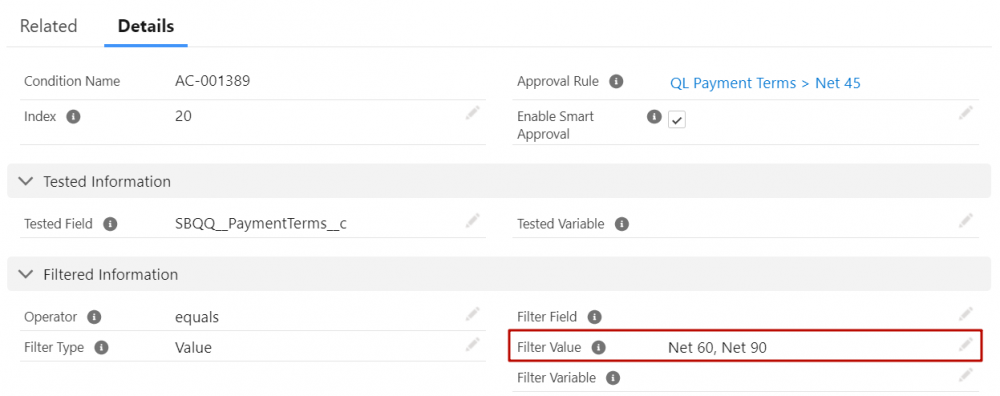
Note that the Filter Value field can accept multiple values separated by commas, which simplifies the approval conditions setup process. For example, when evaluating the SBQQ__PaymentTerms__c field, you can input "Net 60, Net 90" in the Filter Value field. This approach allows you to include various criteria within a single approval condition, eliminating the need for creating separate conditions and adjusting the Advanced Condition logic.
Setting up Advanced Conditions is a two-step process.
The first step is that you must give every condition an index number unique to each condition in your rule.
Once you have identified an index for each of the approval conditions, go to the rule, change Conditions Met from All to Custom and then enter the condition logic in the Advanced Condition field by ANDs, ORs, and parenthesis and by referencing the index numbers from approval conditions.
Comments (0)