
8
NovSalesforce CPQ: Creating Option Constraints
There are lots of scenarios when your sales reps have to enable or disable a product in a Bundle based on another product option. Some typical scenarios include:
- A. Product A becomes AVAILABLE if Product B is selected (enable).
- B. Product A is NOT AVAILABLE if Product B is selected (disable).
This can be achieved by creating option constraints from the Option Constraints related list on the bundle parent product record. Let’s approach the first scenario and see what the basic steps are to create an Option Constraint so that Product A may be selected only when Product B be is selected:
- A. Click the Products tab on the navigation bar.
- B. Click ProductPack1.
- C. Go to the Related tab.
- D. In the Options related list, select View All and note the number of the Option Name for the necessary options:
Product A
Product B
- E. Go back (use the Back button in the browser).
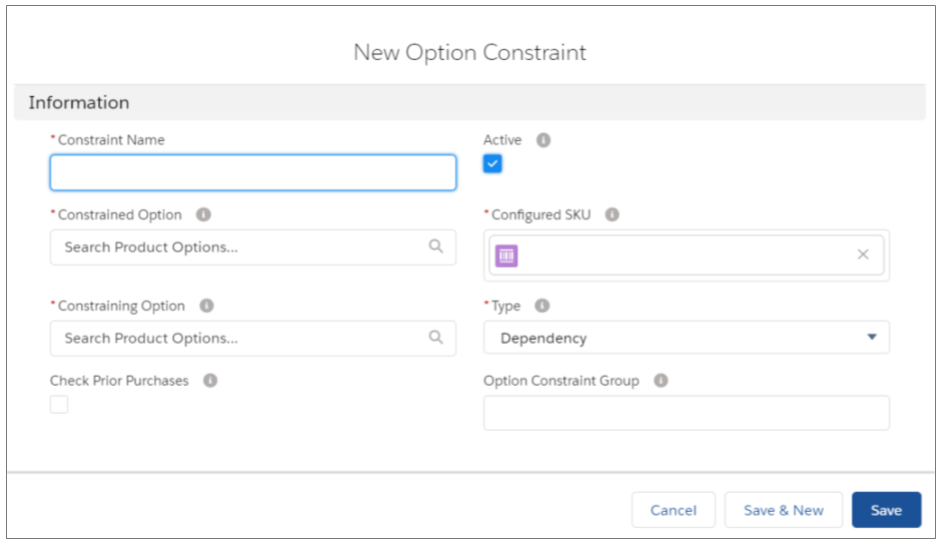
- F. Click New in the Option Constraints related list and fill in the following fields:
Constraint Name: Product A requires Product B (or give it any meaningful name)
Constrained Option: PO-###### of Product A
Constraining Option: PO-###### of Product B
Type: Dependency
- G. Click Save
See below all the fields that might be reviewed when using option constraints:

This is how Option Constraints can be leveraged in order to make sure that only valid combinations of products are being selected when configuring Bundle Products.
Comments (0)