22
DecOnce the opportunity is created, we can go ahead and create a new quote. You can create a new quote by clicking New on the Quote Related list. The issue with this standard functionality is that it does not set pre-defined values on the quote record. Alternatively, it's possible to implement a custom button or a lightning quick action that would allow to quickly create quotes with pre-assigned values. This can be easily accomplished in a few steps:
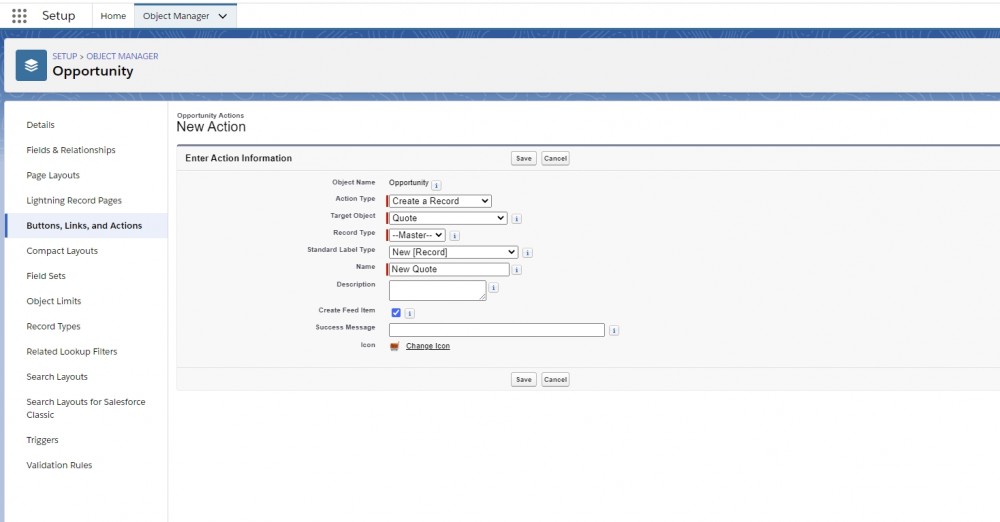
First, you should create a New Quote Quick Action on Opportunity by navigating to Setup > Opportunity > Buttons, Links, and Actions.
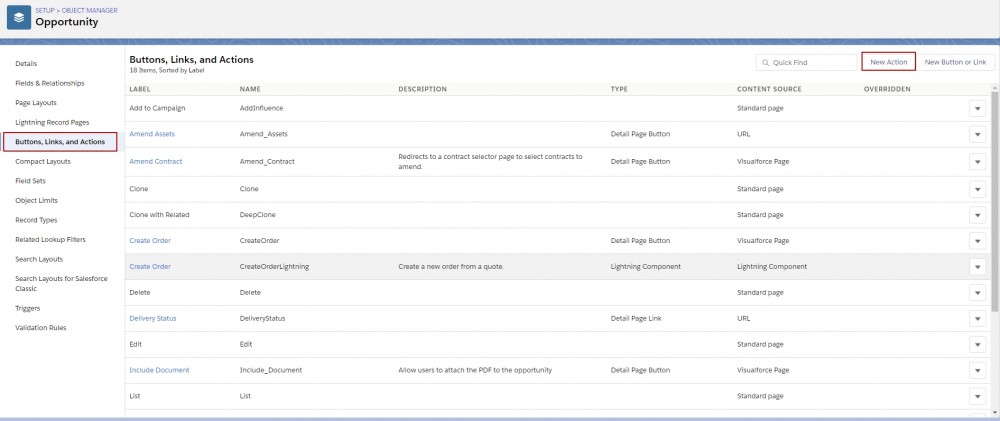
Enter the Action detail here by specifying the following information:
-
Action Type: Create Record, because we want to create a quote record with this action
-
Target Object: Quote
-
Label: New Quote
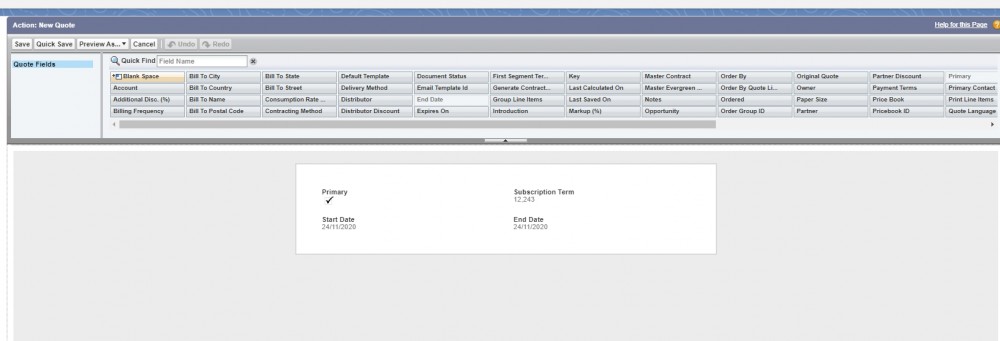
Next, you should add the necessary Fields to the Action: New Quote layout. Make sure you add: Primary, Subscription Term, Start Date and End Date fields.
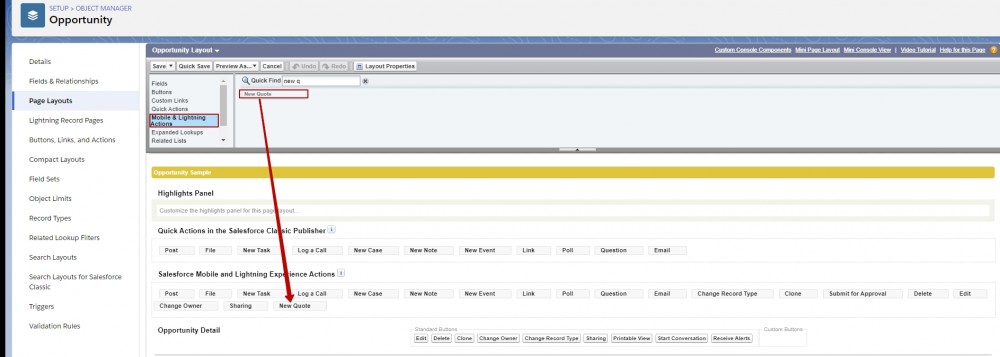
Then you set the Predefined Field Values. Usually, these would include the account (formula to use: Opportunity.AccountID) and opportunity name (Formula = Opportunity.Id). Finally, add the New Quote Action to the Opportunity Page Layout from the Mobile&Lightning Actions to the Salesforce Mobile and Lightning Experience Actions section.
So, on the quote record, we have a few very important fields to set.
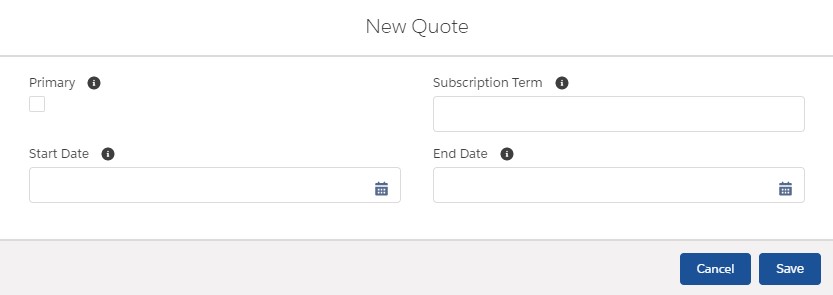
The first one is the Primary checkbox. This field is interesting. On a given opportunity, you can have multiple quotes - as many as you'd like depending on different situations and conversations with the client. But there can be only one primary quote that is synced with your opportunity, and it's contributing to the amount, and it dictates what shows in your forecasting or pipeline. Let's mark this quote as Primary.
Subscription term is another key field, and it specifies the duration of the quote. It is generally defined in terms of months or days, but months is usually what we see. Let's just start by making the subscription term in this case 12. That's a year because the term unit in this test org is "month."
Next, there is the Start Date field that indicates the start date for subscriptions in the quote. I'm going to set the start date of this quote to the first of next month
Now, there is also the End Date field. It shows the end date for subscriptions. In this case, it's not necessary to enter a value because we have the subscription term which is 12 and the package will calculate the end date automatically. However, what happens if we put both values? I mean both the Subscription term and End Date. Well, Salesforce CPQ recognizes the most specific value. And here, the most specific value would be the End Date. Let's go ahead and hit save.
Notice that the account field and the opportunity field have been populated automatically as compared to the standard functionality, and you can see the Primary checkbox checked the Subscription Term, and the Start Date as completed on the previous screen.
Comments (0)