
18
MaySuppose your client wants to sell a bundle made up of 3 products (ProductPack1). Salesforce CPQ can check that Products B and C are automatically selected when the sales representative selects Product A since those options are frequently sold together. In order to set up a selection rule, you will have to take the following steps:
Step 1: Create a Product Rule selecting the Selection type:
A. Click Product Rules tab from the navigation bar.
B. Click New.
► For the Product Rule Name use a meaningful name that would make sense for you or anyone reading it, e.g. Selecting Product A auto-selects Product B and Product C
► For the Type field, choose Selection
► For the Scope field select Product (Mind that Product Selection Rules should always have the scope Product)
► For the Evaluation Event field select Always (This tells Salesforce that the rule must be evaluated during any event)
► Check Active
► For Conditions Met field, choose All
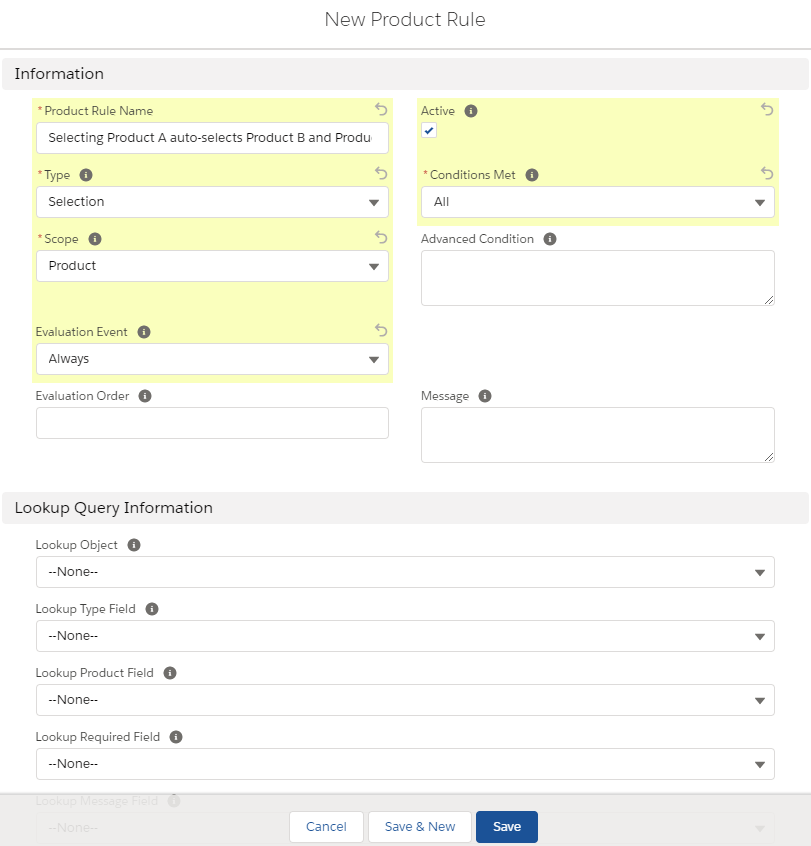
C. Click Save.
Step 2: Create an Error Condition to indicate that the rule fires only when an Option has the product code corresponding to Product A (eg, PRODUCTA)
A. Go to the Related tab.
B. On the Error Conditions related list, click New.
► For the Tested Object select Product Option (this is the object that contains the tested field)
► For the Tested Field choose SBQQ__ProductCode__ c
► For the Operator field choose equals
► For the Filter Type field choose Value
► For the Filter Value enter PRODUCTA

C. Click Save.
Step 3: Create two Product Actions that will select Product B and Product C whenever the rule executes.
A. On the Actions related list, click New.
► For the Type field, select: Add
► For the Product field, choose Product B
► Check Required
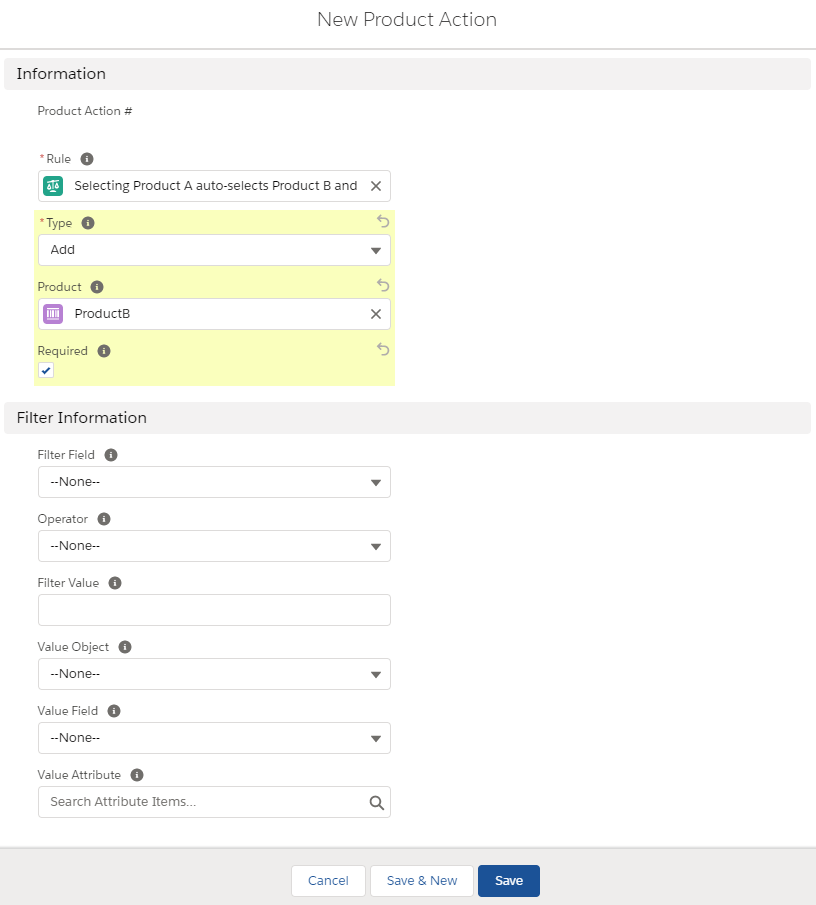
B. Click Save & New and repeat the steps for the Product Action for Product C.
Note that several action types are available:
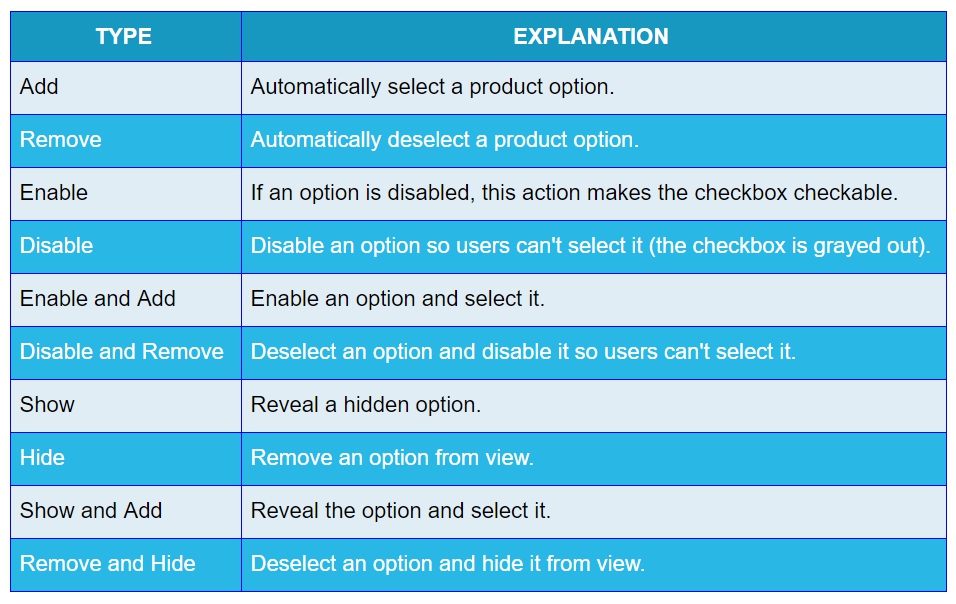
It's important to mention here that Hide action only removes an option from view, but it doesn't remove a product that was previously selected. If this is the case, then it's necessary to use combinations of actions like Remove and Hide, or Disable and Remove, etc. Also, whenever the action type is Add, the Required checkbox should be checked.
Step 4: Create a Configuration Rule to show that the selection rule will apply to the ProductPack1 bundle.
A. In the Configuration Rules related list, click New.
► Check Active
► For the Product, select ProductPack1
B. Click Save.
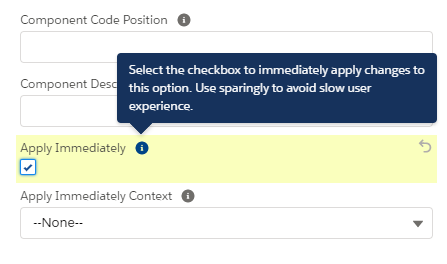
Step 5: Update Product A option to always trigger the product rule evaluation.
A. Go to the Products tab on the navigation bar.
B. Click the ProductPack1.
C. Click the Related tab.
D. On the Options related list, click View All.
E. Click the PO number of the Product A option.
F. Click Edit.
► Check Apply Immediately
G. Click Save.
Step 6: Check whether the rule behaves as expected by adding ProductPack1 to a quote.
A. Click the necessary quote.
B. Click Edit Lines.
C. Click Add Products.
D. Check the ProductPack1 product.
E. Click Select.
F. Check the Product A option.

Pay attention to the fact that Product B and Product C options are automatically selected.
This rule can be scaled across different bundles if they share similar setups.
This is how Product Selection Rules help sales reps configure bundles accurately and faster.
Note that if you select the System checkbox on the Product Option record, the option becomes system managed and the user can't select or deselect it manually.
Comments (0)