19
JanPreviously, we discussed how to create quotes and add the company logo and the draft watermark to it. Now let's see how you can further customize your CPQ Quote Documents and give them a more professional and organized look.
First of all, on the quote template record, there are several fields that let you choose how page numbers appear on the final CPQ Quote Document based on your company's styling needs.
Navigate to the quote template and take a look at the following fields in the Header/ Footer Information Section:
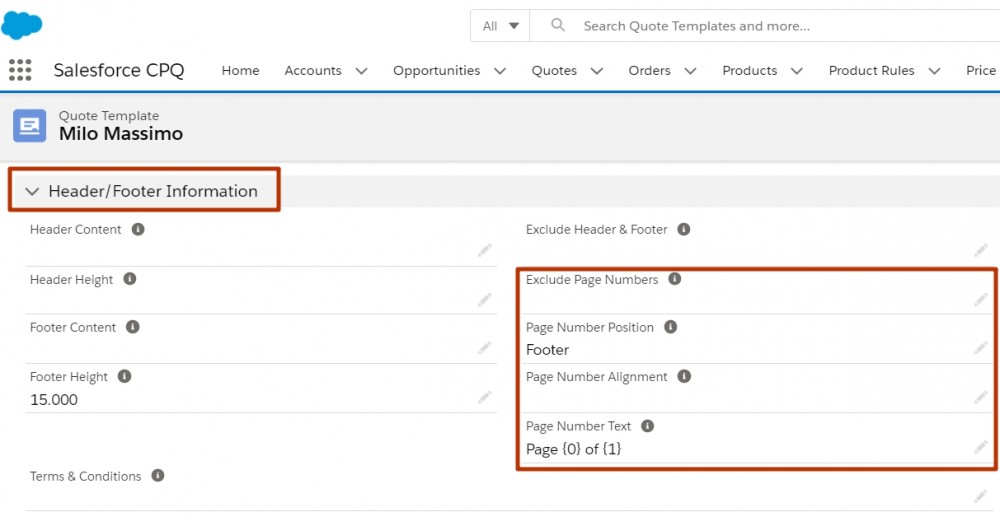
The first field is Exclude Page Numbers. It gives us the possibility to exclude page numbers from:
- All Pages
- First Page
- Last Page
- First and Last Page
For example, if you have a title page, you can make sure that the page number won't appear on it. You can test this functionality by adding a cover page to your quote template and then selecting the First Page option for this field. Then click Preview.
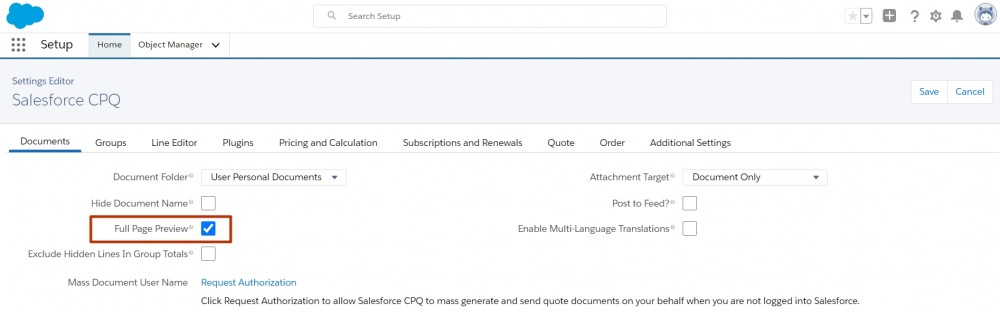
Pay attention to the fact that when previewing the document, the page is quite small. But we can make it bigger. Go to the Package Settings in Setup, click Configure next to Salesforce CPQ. Right on the Documents tab, which contains the output document settings, there is the Full Page Preview checkbox. As the name suggests, this setting displays the quote document preview in full page. Mark it true, and you'll see the change in action.
Mind that there is one known issue regarding this field. When you select an option for the 'Exclude Page Numbers' field or when you attach an Additional PDF Document, the hyperlinks, if you've got any included in the Template Content, will appear on documents as a URL rather than rendering as their clickable label.
The workaround would be not to use Exclude page numbers or not to attach additional PDF documents. Alternatively, PDF Documents could be saved to an image format and then included as Template Content.
Then you can control where the page number is positioned from the field Page Number Position. The options are:
- Footer
- Header
Next, you can justify the page number either left or right or center from the Page Number Alignment field. If you leave this field blank, page numbers will be centered by default.
Page Number Text field sets the layout of the page number text. Basically, there are two options here:
- Either you show just the current page number, in which case you should input {0}
- Or you could show the page number as compared to the total number of pages - "Page {0} of {1}"
If you leave this field blank, it defaults to the second option.
Note that when we preview or generate the PDF quote document, we can set the document's page size with the Paper Size menu, which is below the Template Section.
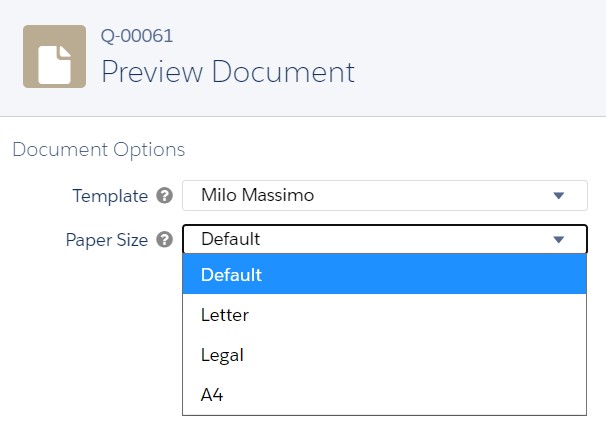
So, the Paper Size menu offers four options:
- Default - these are the sizes specified on the quote template in the Page Width and Page Height fields.
- Letter
- Legal
- A4
The last three options override the default values, which is very convenient because one single template can be used for different sizes depending on the situation. For example, suppose you need to generate a quote for a partner based in Europe. In that case, the sales rep will need to set the output size to A4 because most countries in Europe and Asia use the standard known as "A4" while the United States use their own standard paper sizes like Letter and Legal.
Comments (0)